Tuesday 29 January 2013

Origami Paper Stars! Pin.009


Hello all! so I was considering which pin to do this week when I came across this tutorial for origami stars by Minna May. The great thing about this pin is that all you need is a piece of paper! the stars can be used for loads of things... cards, decorations... um.. cards and decorations??

Okay so I'm feeling particularly unimaginative right now but I'm sure you can think of lots of things to use them for... right?

Anyways... They were quite fun to do, quite quick and not too tricky after a bit of practice. I practised with plain white A4 paper then used the pretty patterned paper afterwards.


Got an A4 piece of paper? Then you're ready to rumble!


The tutorial asks for strips of paper 8.5" x 0.5". However, the shorter side of A4 is 8.3" so I used that measurement and it worked fine :)


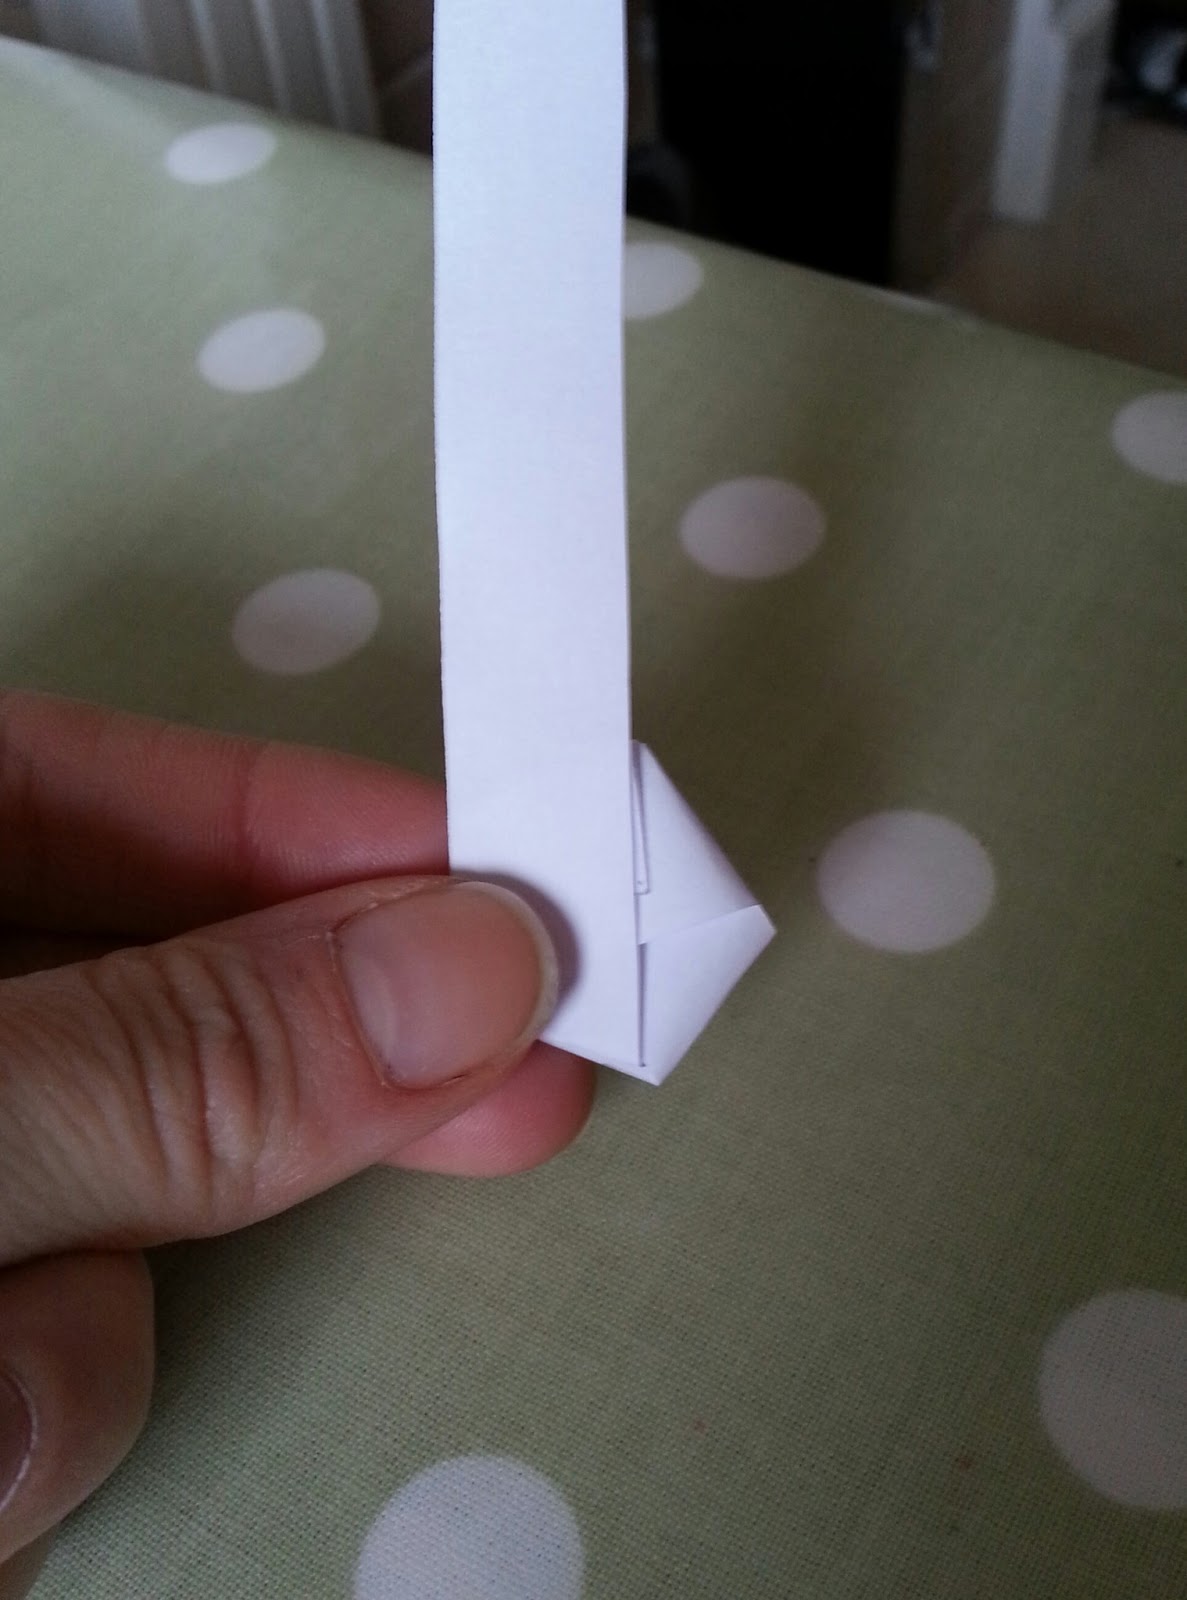
Make a ribbon shape with the paper, fiddle around with it until it looks like this:


Poke the short tab inside the hole and gently pull through


You then need to flattern the paper a bit and fold over the excess tab:


Then begin folding the long strip of paper over the base of the star:


 And fold it over the back of the star:


And keep going. You will find that the paper sits comfortably in one direction so you don't have to worry too much about folding it in the wrong angle. Eventually you'll get to the end of the strip of paper and have something that looks like this:


You then need to tuck the tab inside the folds so it's hidden. Like this:


And you should have something like this:


The next bit required two hands so I couldn't take a picture, so I have borrowed one from Minna May. Holding the star, push your nail into each side of the star, forcing it into a star shape.


And Ta Da! You are finished!


Like I said before, it takes a bit of patience and practice, but they came out really nice! It's trickier with thicker paper, but I think the trick is to make sure the stars are folded quite tight - though take care not to tear them!


It took a couple of attempts, but I soon got the hang of making these stars. To do it properly it's not super quick but it doesn't take ages either! I think they look best on pretty patterned paper. I have yet to use them for anything but I'm impressed with how well these came out. I am by no means a seasoned origami maker! Please let me know if my instructions need clarifying - it's a hard thing to describe!

Monday 14 January 2013

Sixty-Second Chocolate Chip Cookie! Pin.008


I originally wanted to try out the Nutella cookies that I had pinned a little while ago (love Nutella!). However, the recipe required an entire jar and we only had a 1/3 of a jar left. Also all the Nutella recipes I came across were American, and it gets really tricky to calculate cups into metric measurements, especially for things like Nutella.. I will attempt these at some point but for now I settled on this pin: Microwave Chocolate Chip Cookie.

The pin I posted led me to.. surprise surprise.. nowhere! This seems to be a common theme with my pinterest pins.

I googled the recipe and found two possibilities. One was from 'Zoomyummy' and the other, from 'No. 2 pencil'. I decided to go with the latter as it made less cookie and suggested using only egg yolk rather than whole egg to avoid a 'cakey' consistency.

                                               
Ingredients:
1 Tbsp Butter
1 Tbsp Granulated White Sugar*
1 Tbsp of firmly packed Dark Brown Sugar*
3 Drops of Vanilla Extract
Small Pinch of Salt
1 Egg Yolk (discard the egg white)
1/4 cup (that's about 37g) of All Purpose Flour
2 Tbsp of Semi Sweet Chocolate Chips

*I didn't have any brown sugar so just used 1.5 tbsp of granulated white sugar.


1. Put the butter in your cup and melt in the microwave on a low heat.

2. Add the sugars, vanilla and salt and stir to combine. 


3. Separate the egg and add only the yolk to your cup. Stir to combine. Add flour, then stir again. Add the chocolate chips, and give a final stir.


4. The cookie will need to microwaved for anywhere between 40-60 seconds. Cook in the microwave on full power for about 40 seconds and see if the cookie is done. Depending on your microwave, it may need longer, but be careful not to overcook.


I really wanted to like this.. especially after the success of my Microwave Mug Brownie post. But.. it failed to impress. I mean it was full of butter, sugar and chocolate so believe me, it didn't taste bad... But the problem was the consistency. I was very aware of over-cooking it so it was only in the microwave for 40 seconds. As you can see from the pics, the cookie was undercooked on the top but was well cooked at the bottom. Any longer in the microwave and the cookie would have been too dry. On the upside it was quick and easy to do, and used ingredients from the cupboard.

I think next time I will try the recipe from 'Zoomyummy' and compare the two. I may also use brown sugar next time and see if it makes a difference. Ah well, you win some, you lose some!

Next up.. Another crafty post! But it's a surprise so you'll have to wait and see! ;) 

Thursday 10 January 2013

Roly Poly Mince Pie Pastries! Pin.007


This was the pin I was meant to do oh.. well.. nearly 3 weeks ago now.. I was umming and ahhing over whether to make them on not, part of me felt that making mince pies after Christmas was just weird! However, I am not one to accept defeat so I persevered telling myself that they were pastries really.. not mince pies.
Let me tell you, these were worth the wait!

The original pin led me to the BBC Good Food website. You can see the original recipe here. I'm always on the look out for new ways of doing classic recipes, last year I made Jamie Oliver's mince pies (also very yum). I thought this year I'd give these a go.

I'm not really sure what to call these, so i've settled for 'Roly Poly Mince Pie Pastries'

Ingredients:
50g caster sugar
1 sheet of ready-rolled puff pastry
411g jar traditional mincemeat
1tbsp milk
25g flaked almonds

Optional:
Icing sugar
Glacier Cherries

You'll also need:
Rolling pin
Baking paper/greaseproof paper
Baking tray

1. Scatter the sugar over the worktop, unravel the pastry, then roll it out so it's a quarter bigger, but keeps its rectangular shape.


2. Spoon and spread the mincemeat evenly over the pastry leaving a border along the longest edges. Fold one of the longest edges over the mincemeat then roll the pastry tightly into a sausage shape while gently pressing the pastry into the mincemeat. When you get to the other edge, brush it with milk and press down to seal in the mincemeat. 


3. Press both ends in gently to plump up the roll. Okay.. I may have been being dumb but I thought it meant to push the ends of the roll together as shown by the black arrows below.. BUT.. it actually meant push in the direction of the orange arrows (referring to the ends of the pastry sheet, I think).


As a result, my pastry roll looked like a squashed catapillar:


Looks kinda gross right??

4. Put the pastry in the fridge for 30 minutes to firm it up. Preheat the oven to 200C/gas 6/ fan 180C. Cut the roll into 12 rounds, about 3cm thick. Lay them evenly spaced on a large, greased baking sheet on a baking tray and flatten them with your hand so they look like squashed Chelsea buns. 


As you can see, mine weren't the neatest slices, the pastry teared a little, so some of the mincemeat came out.

5. Scatter the almonds on top and bake for 20-30 minutes until golden brown and the mincemeat sizzles.


Sorry this picture is so blurry, I think my camera lens got fogged up, but you get the idea! I left mine in for a little too long, you want them lighter than the ones in this picture!

6. Leave to cool for 5 minutes - keep them separate so they don't stick together - Haha, yeah right! They will probably get stuck together, especially if you mincemeat oozes out like mine. Just make sure your baking tray is properly greased!

I then added two steps of my own:

7. Once cooled, make up some icing using a minimal amount of water, you want a fairly thick consistency. Swirl the icing over the pastries, making a blob in the middle for your cherry. Put half a glacier cherry on each pastry.


I really recommend icing them, though feel free to leave off the cherry if you're not keen on them. They made my slightly overcooked pastries really moist and yummy!

I'm not very experienced with using pastry, so I did find it a bit fiddly and awkward at first. However, despite oozing mincemeat and slight overcooking these pastries were really tasty and definitely worth the effort. The preparation doesn't take long, though you have to take the 30 mins chilling time into consideration. I think I may have been a little hasty in getting the pastry out of the fridge which may be why it tore.

"These were really tasty, I think the icing and the cherries really made it something special. It's a great alternative for the traditional mince pie. I'd happily eat these all year round!"


If you have any leftover mincemeat, or find any in the sales, give these a go, I promise you won't regret it!

Is there a particular pin you would like to see me try?  If you look on the left side of this blog under the section 'About Me' you'll see a heading 'Pinterest'. If you click on the image it will take you to my Pinterest page where you can see all the things I've pinned. Comment on this post if there is anything in particular you'd like to see me attempt and I'll do my best! Otherwise I'll choose something at random for my next post!  

Tuesday 1 January 2013

Hello and Happy New Year!

Hello and Happy New Year! I hope you have all had a good Christmas! I didn't do too well this year as I was poorly over Christmas (sympathy always appreciated!) and then working new year's eve (hence the distinct lack of posting...!). I was also on holiday with my family and had no signal or internet (shock horror). Anyway enough of my excuses...

See my newly updated post: 'Jazzed Up Fairy Lights' (Pin.006) for a quick and easy way to update your fairy lights:

Also...

See my finished Christmas Card holder! (Pin.004) I lurrve it!


Not one to give up, I am still hoping to do my Roly Poly Mince Pies! I know.. it's not Christmas anymore but they're really more like pastries than mince pies honest! Also a good way to use up any leftover mincemeat! Check back here soon!